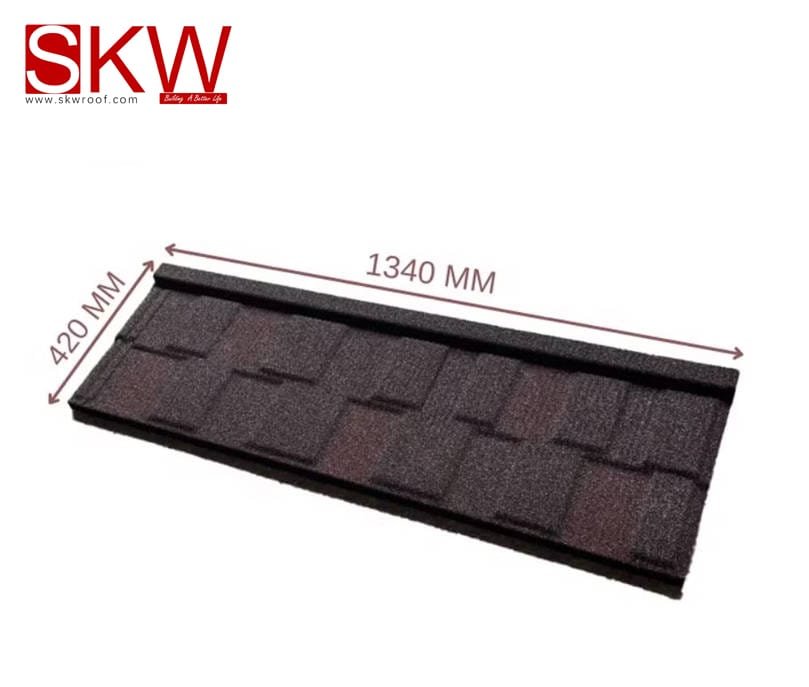

A durable, weatherproof, and aesthetically pleasing roof is the core protection of any building. Among countless roofing materials, stone-coated metal roof tiles have become a top choice for residential and commercial renovation projects worldwide. They combine the toughness of metal substrates, the anti-corrosion performance of special coatings, and the classic texture of natural stone, featuring lightweight, wind resistance, rainproof, heat insulation, and a long service life of over 50 years.
Compared with traditional clay tiles and ordinary iron sheets, stone-coated metal tiles are easier to install with lower construction thresholds. With standard operating steps, even self-build homeowners or novice contractors can complete a neat and firm roof laying. Today, we will share a complete, beginner-friendly step-by-step installation tutorial for stone-coated metal tiles, covering preparation, laying, fixing, detail processing and final inspection to help you avoid common construction mistakes.
1. Pre-Installation Preparation & Tool Checklist
Qualified preparation is the premise of flawless roof installation. Before construction, you need to complete roof base inspection, material sorting and tool preparation to ensure smooth progress.
1.1 Roof Base Inspection
First, check the roof slope, base flatness and structural firmness. The ideal slope for stone-coated metal tiles is 15°–60°. A slope too flat will cause poor water drainage and hidden leakage risks, while an overly steep slope requires enhanced fixing measures. Remove all dust, debris and protruding sundries on the roof, and repair cracked or loose base structures to ensure the entire roof surface is flat and load-bearing.
1.2 Required Tools & Materials
Prepare all supplies in advance to avoid construction interruption:
- Core materials: Stone-coated metal tiles, matching ridge tiles, valley gutters, eaves flashings, barge board covers
- Fixed accessories: Special color-matched self-tapping screws, corrosion-resistant wood thread screws, waterproof sealant
- Construction tools: Electric drill, screwdriver, measuring tape, level, cutting pliers, bending tool, hammer, safety climbing equipment
- Auxiliary materials: Anticorrosive wooden battens (20×40mm vertical battens, 30×30mm horizontal battens), waterproof underlayment
1.3 Pre-Construction Notes
All wooden battens must be dry with a moisture content below 12% and treated with anti-corrosion and anti-rust treatment to prevent deformation and decay in later use. Arrange tiles in advance according to the roof area to reduce cutting waste and ensure uniform overall layout.
2. Step-by-Step Formal Installation Process
The installation of stone-coated metal tiles follows a strict bottom-up, left-right interlocking principle. This standard sequence ensures that all overlapping joints fit tightly, and rainwater can flow down along the roof without backflow or leakage.
Step 1: Lay Waterproof Underlayment & Fix Battens
First, lay the waterproof underlayment fully on the cleaned roof base, with overlapping laps between each piece to form an integral waterproof layer, which can effectively prevent rainwater from penetrating the base through tile gaps. After the underlayment is fixed, install vertical and horizontal wooden battens in sequence. Fix vertical battens perpendicular to the roof ridge first, then install horizontal battens parallel to the eaves. The spacing of horizontal battens shall strictly match the overlapping size of the tiles to ensure consistent laying gaps and neat overall appearance.
Step 2: Install Eave & Valley Accessories
Start with auxiliary component installation to lay a foundation for subsequent tile laying. Pre-cut and bend the eaves flashings according to the roof size and fix them on the outermost eaves battens to block rainwater and guide it into the gutter. For roofs with valleys, install valley gutters from bottom to top, with a standard overlapping distance of 50–100mm between each section to ensure smooth water drainage at the valley and avoid water accumulation.
Step 3: Lay the First Row of Tiles (Eave Position)
The first row of tiles at the eaves determines the overall flatness of the entire roof, which is the most critical step. Start laying from the bottom right corner of the roof. The tiles need to overhang the eaves by 5–8cm, which can effectively guide rainwater into the gutter and prevent water from soaking the eaves wall. Align the tiles horizontally with a level to avoid tilt, and make preliminary positioning after confirming flatness.
Step 4: Interlock & Fix Main Roof Tiles
Each stone-coated metal tile is designed with a professional interlocking groove on the side edge. When laying adjacent tiles, align the grooves and press them tightly until you hear a clear clicking sound, which means the interlock is fully engaged. Incomplete interlocking will lead to gaps and cause wind leakage and rain seepage in bad weather.
For fixing, use special color-matched self-tapping screws. Each standard tile requires at least 4 screws, fixed obliquely at the arc transition of the tile edge. For steep slopes (over 60°) or high-rise buildings, increase the number of screws to 6 per tile to enhance wind resistance. Note that the screws should be fastened moderately—over-tightening will squeeze the tile coating and cause damage, while loose fastening will lead to unstable tiles.
Lay row by row upward in accordance with the interlocking rule, keep the overlapping distance between upper and lower rows consistent, and check the flatness and gap uniformity at any time during construction.
Step 5: Install Ridge Tiles & Barge Accessories
After all main roof tiles are laid, start the closed installation of the roof ridge. Install ridge tiles along the direction of the roof ridge, with overlapping laps between adjacent ridge tiles, and fix them with special screws. After fixing, seal all screw holes and gaps with waterproof sealant to avoid water penetration at the ridge.
For the roof side barge boards, pre-bend the barge board covers according to the roof edge radian, lap them tightly with the edge tiles, and fix them with screws to make the roof edge neat and fully closed.
Step 6: Local Cutting & Finishing
For complex positions such as roof corners, ventilation openings and pipeline penetrations, use cutting pliers to cut tiles accurately according to the actual size. After cutting, polish the incision smoothly to avoid sharp burrs scratching the coating. Fit the cut tiles closely with the flashings, and fill all gaps with waterproof sealant to achieve full waterproof closure.
3. Post-Installation Inspection & Maintenance Tips
After the overall installation is completed, do not end the construction directly. A comprehensive inspection can eliminate hidden dangers and extend the roof service life.
3.1 Full Inspection
- Check all tile interlocking joints to ensure no loose gaps or misalignment
- Verify that all screws are firmly fixed with no missing or loose fastening
- Inspect ridge, valley, eaves and edge positions to ensure complete waterproof sealing
- Clean up all construction debris on the roof to avoid blocking the drainage system
3.2 Daily Maintenance Guidelines
Stone-coated metal tiles are almost maintenance-free, but simple regular care can keep the roof in perfect condition for a long time. Regularly clean roof dust, fallen leaves and accumulated dirt to avoid blocking drainage channels. Check the sealing glue and screw firmness once a year, and repair aging or falling sealing glue in time. Avoid walking on the roof frequently or placing heavy objects to prevent stone coating peeling and tile deformation.
4. Common Installation Mistakes to Avoid
- Wrong laying direction: Laying from top to bottom will cause overlapping gaps to face the rain direction, leading to serious water leakage
- Incomplete interlocking: Casual laying without tight clamping will reduce wind resistance and waterproof performance
- Improper screw fixing: Too many or too few screws, or excessive fastening will damage the roof structure
- Ignoring detail sealing: Neglecting screw holes, ridge gaps and cutting joints is the main cause of roof leakage
Final Words
The installation of stone-coated metal roof tiles is not complicated, but it requires strict adherence to standardized processes and attention to every detail. A scientific and standard installation can not only give full play to the advantages of wind resistance, waterproofing and durability of the tiles, but also make the roof present a neat, high-grade stone texture, greatly improving the overall aesthetics and value of the building.
Whether you are preparing for roof renovation or new building construction, this step-by-step guide can help you complete professional laying. If you want to know more about material selection, roof matching and construction customization skills, stay tuned for our subsequent sharing!